

Today I am very excited to introduce you to Kim Mitton, who is the creator behind Mitton Musings the Canadian lifestyle blog with an inspirational twist. Take a look at this fabulous chromatography post and then hop on over to discover some of the other, many beautiful posts Kim has written.
You can also find inspiration from Kim on
Greetings! I am so pleased to share some thoughts with RedHeaded Patti as a guest blogger! As a scientist and mom of four (plus the extra odd neighborhood kids and students that sometimes visit), it was a no-brainer for me to answer her call for a SUMMER OF STEM ideas!
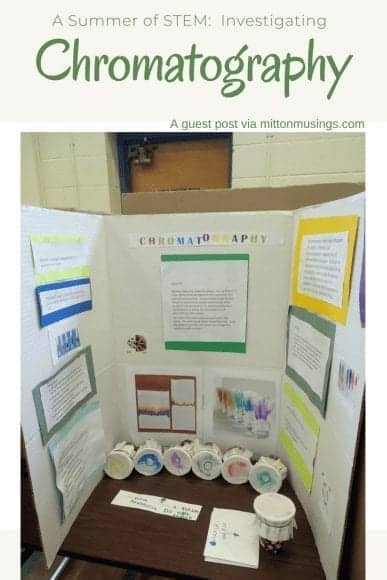
We are always learning and love to share with others! So let’s get right down to it: Let’s investigate Chromatography! We originally tackled this project for this year’s science fair and it is a perfect investigation for all sorts of children or students… you can tailor it to any age by investigating just a bit deeper or a little less. We wanted something easy, fun and
To read about our finished project, check out the link here. We post every Tuesday and would love to have you join our adventure over at mittonmusings.com!
Chromatography, in its simplest terms, means “separating parts of a mixture”. Scientists do this for all kinds of mixtures: gases, liquids
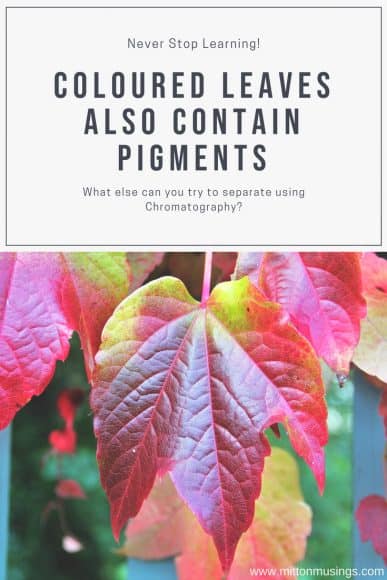
Distillation is closely related to chromatography and is another method for separating mixtures. Perhaps you can investigate the differences? For our example, we are going to be using paper chromatography to separate liquid pigments (in markers) into their various
So… let’s gather our materials:
- paper cups
- coffee filters
- markers (various colours and types)
- rubbing alcohol
- elastic bands
- a dropper
- a coin
- water
Once you have all your materials now is when the fun starts!! Here’s the basic method and what our results were. Feel free to try all sorts of markers and colours and see what results you get!
- We took 6 cups and wrapped one coffee filter on the top of each cup and secured it with an elastic band
- We picked 5 sharpie colours and traced the coin to make a circle on the filter
- We dropped a few drops of alcohol inside the ink circles and watched the circle as it “grew” and separated by moving along the filter paper
- We did the same with the Crayola marker, except we used water instead of alcohol (you’ll see why later)
Our Results:
The ink separated (spread) and some turned into different colours along the coffee filter.
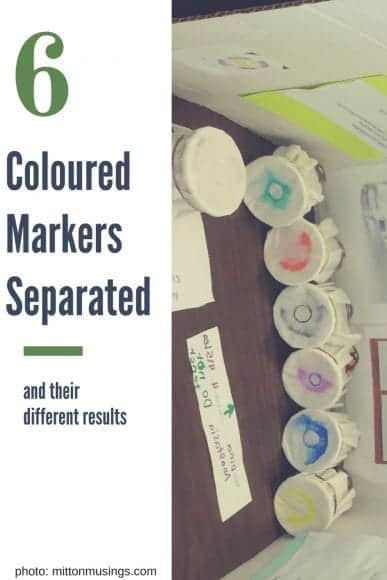
Green…. showed yellow
Dark Blue…. showed a light then darker blue
Purple…. showed pink and violet
Teal…. showed yellow and blue-green
Black (Sharpie)…. showed purple
Black (Crayola)…. showed blue and pink
Our favourites were teal and purple!!
Wasn’t that fun?! Now, as good scientists, we have to ask the question: WHY? Markers have ink — that’s what makes the colours. Ink is a mixture of a fast-drying liquid and pigments (the substances that give something colour). Sharpie markers have alcohol-based ink (permanent), and Crayola markers have water-based ink (not permanent). So, when we added more liquid (alcohol or water), the ink spread out and separated into other colours. Did you notice that black is really a mixture of a whole bunch of colours?!
We also observed that some colours spread out further than others. The water based marker spread the most. This is because “solutes” (the things that make up a mixture) will move along depending on how much of the solute there is in the mixture. Water based inks have a lot of “solvent”(the stuff that solutes are mixed into)…which is why they are not permanent and are easily washable. Some inks showed more than one colour even though they started out looking like only one! This shows us that inks (or pigments) are really made up of a mixture (or solution) of different colours that produce the various shades of “single” marker colours. Isn’t science great?!
We hope you enjoyed this fun and easy science experiment. Remember it next time you are enjoying some colouring this summer with your markers — and don’t ever stop learning.


