Are you looking for a way to squeeze more veggies into your diet without squeezing more money out of your wallet? Would you like to know your food is free of the pesticides and other nasties that are often sprayed on commercial crops? Well, re-growing food from your kitchen scraps is a good way to do it.
There’s nothing like eating your own home- grown vegetables, and there are heaps of different foods that will re- grow from the scrap pieces that you’d normally throw out or put into your compost bin. It’s fun, it’s very simple if you know how, and it’s also an excellent way to involve your children in an educational activity that is practical and fun for you all.
The most important thing to remember is that the quality of the “parent” vegetable scraps will determine the quality of the re-grown vegetables. If you want to ensure your home grown plants are as natural as if they were growing wild I would recommend, wherever possible, buying local, GMO-free, organic produce. This can be more expensive but in the long term you will be growing your veg fro free, and you will know your re-grown plants are fresh, healthy, free of chemical contamination and GMO-free.
Leeks, Scallions, and Fennel
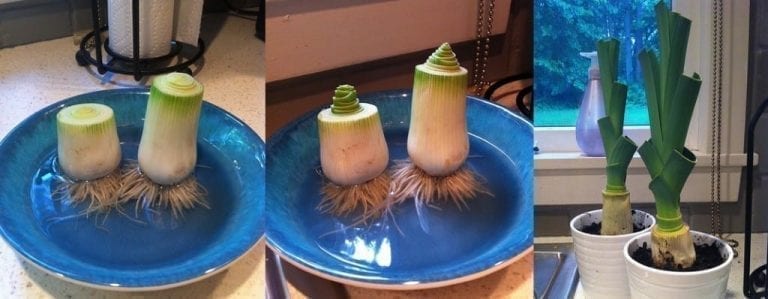
The technique for all of these plants is the same. You can either use the white root end of a vegetable that you have already cut or buy a handful of new vegetables to use specifically for growing.
You just have too put the white root end in a bowl, saucer or glass jar with a little water, and leave it in a sunny spot. I used to leave ours on the ground by the back door but soon discover critters were coming along and drinking the water, so we brought them inside, and now they sit by the kitchen window. The green leafy part of the plant will continue to shoot for as long as you keep it in water. When you want to use them just cut off what you need and leave the white root end in water to keep growing. You might never have to buy another one again!
Lemongrass

To grow your lemongrass cut all the grass, you need from your parent plant and put the root in a jar of water in the sunshine. You can place multiple plants in one pot, but be careful not to overcrowd them.
One the new grow started to appear (this will take
about a week) transfer your lemongrass into a pot and put it outside in the sun. When the stalks are
about a foot tall, it is ready to harvest, and you can start the whole process again with the root. One word of warning, don’t plant it directly into your garden. It is just like any other grass in that it will spread and you might soon have a lemon grass lawn. On reflection, that might not be so bad after all.
Celery, Bok Choi, Romaine Lettuce & Cabbage

The process for these is similar to the one for leeks, fennel, and scallions. You can regrow celery, lettuce, cabbage, and bok choi in water from the white root. Chop the root end off as you normally would and set it in a bowl of water, being careful not to cover the top of the cutting with water. Again, place it in the sun and after just a few days you should see new roots and leaves appear.
The difference between these veggies and the leeks etc. is that after a week or so you should transplant the cabbage/lettuce / bok choi into soil. When you plant them ensure the root is completely covered and the leaves are just above the level of the dirt. It will only be a few weeks until you have lovely bushy plants ready to harvest.
Ginger
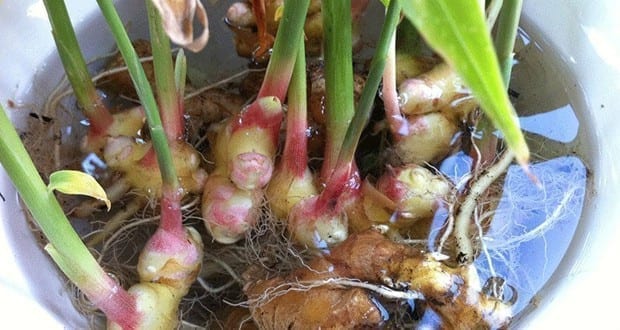
Ginger is so easy to grow, it practically does everything itself. All you have to do is stick a piece of knobbly ginger rhizome in some soil and keep it in a warm spot, but out of direct sunlight. Keep the plant moist, and it will soon begin to grow new shoots and roots. At this point you just let it grow and when you want some fresh ginger to pull up the entire plant, break of as much rhizome as you need and start again.
Potatoes
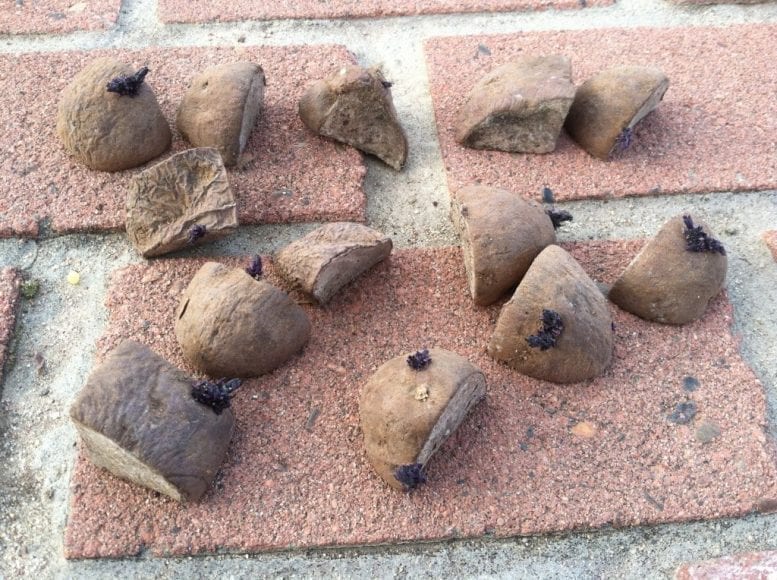
You’ve seen tThe Martian, haven’t you? If Matt Damon can grow potatoes from scraps on Mars, you can do it here on Earth, and you don’t need to use people poop like he did either. Phew.
To grow your potatoes take the ones with eyes that are left in the cupboard because you were going to make mashed potatoes but ordered a pizza instead. Cut them up so that each piece has one or two eyes and leave them to dry out for a couple of days. This stops the potatoes going rotten in the ground when you plant them.
Plant the pieces, with the eyes pointing to the sky, into a container, or garden bed that is at least 20 centimetres deep. Cover the potato piece with about ten centimetres of soil and add more as the plant begins to grow and roots appear at the surface of the earth.
Repeat for about 12 weeks by which time your potatoes will be ready to harvest.
Garlic

The process for garlic is very similar to that of ginger. Just plant a clove, with the root pointing downwards, and leave it in a warm sunny spot. The clove will produce new shoots which you cut back, so the plant uses all of its nutrients to grow a big garlic bulb.
After you harvest each build, rip off a clove and start again.
Onions

Another easy peasy lemon squeezy vegetable to grow at home. When you chop the root off of your onion make sure you leave about one centimetre of onion flesh on it. Put it in some oil in the sun and keep it moist. Hey presto four months later you have another onion.
Sweet Potatoes
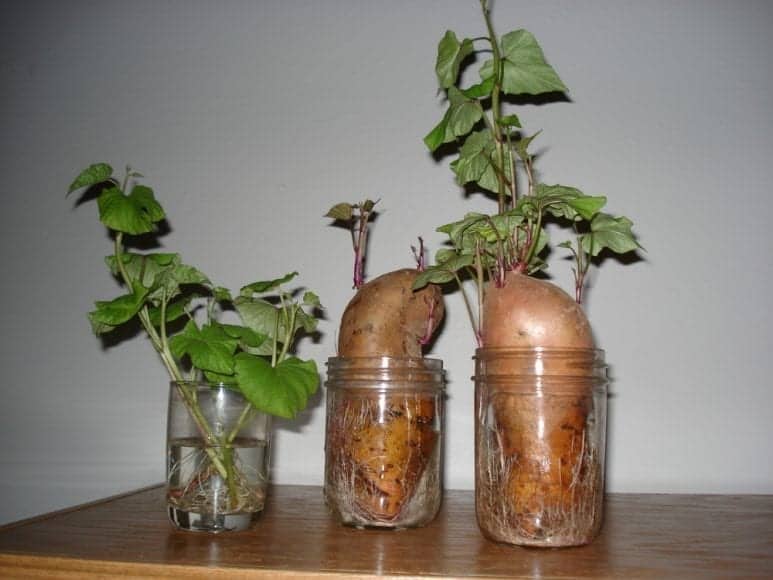
Prepare the sweet potatoes for planting in the same way as regular ones. Plant in a sunny, moist location in about three centimetres of soil. When you see the new shoots poking their heads above the surface, replant them about a foot apart and leave for four months, making sure to keep them moist.
Mushrooms
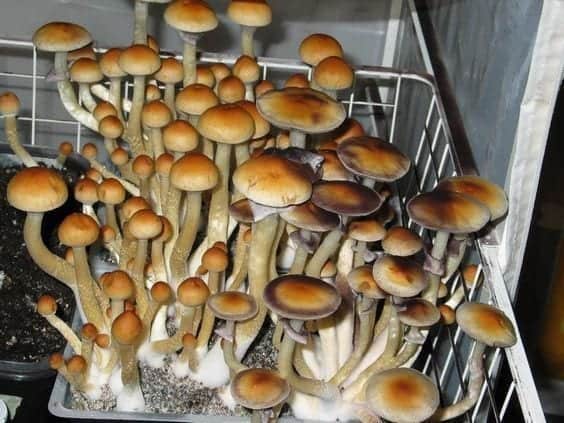
On the flip side of the easy to grow veggies is the mushroom which is by far the most difficult to produce on this list. Use a bucket, or other mobile container and fill it full of a soil and compost mix. Plant the stalk of your mushroom in the soil, leaving just a little of the top edge to poke out of the soil.
You have to experiment with the placement of your mushroom container. They enjoy warm, filtered light in the daytime and a cooler dark spot at night. Once you have planted your stalk, it will either start to grow or start to root in the first week. If it starts to rot, mix it into your soil mixture and try again, varying your positions and temperatures until you get the right combination.
Pineapple

This isn’t the most practical fruit to regrow, but it is definitely great fun fo the kids.
Chop off your leafy pineapple crown and clean any flesh off of it. Slice small, horizontal chucks from the bottom of the crown until you see root buds which look like small circles on the flat base of the stalk then take off the bottom leaves until you have about two centimetres at the lower part of the crown.
Put the crown in water, using cocktail sticks to balance it, so the bottom is just touching the water. Keep it well watered and nice and warm until the plant is established and in just three years or so you will have a home grown pineapple
Carrots

This won’t grow you any fresh carrots, but it is fun for the little ones because you see some growth in the first day or two.
Chop the end off of your carrot and put in a shallow bowl or plate with just enough water to go half way up your cutting. Place the bowl a spot where it gets the light but is not in direct sunlight. In a couple of days, you’ll have a bushy carrot top. You can plant these bushy heads in soil but you won’t get any veggies from them, this one is purely fun.
Growing your own can seem daunting but it is incredibly fun to do, and once you get into the rhythm it’s easy, rewarding, healthy, and cheap. Good luck and let me know how you get on.


