
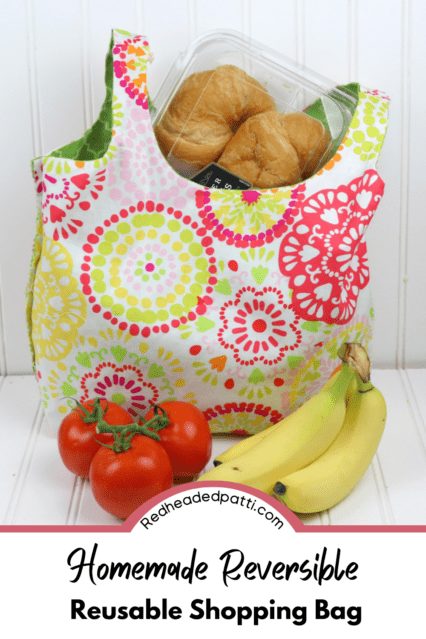
An excellent way to use up larger fabric scraps, these reversible fabric shopping bags also make fabulous gifts. Make one with patterns that reference a friend’s fandom obsession, use a colleague’s favourite colour or use plain fabric and have your child decorate with fabric markers for a one-of-a-kind teacher gift.
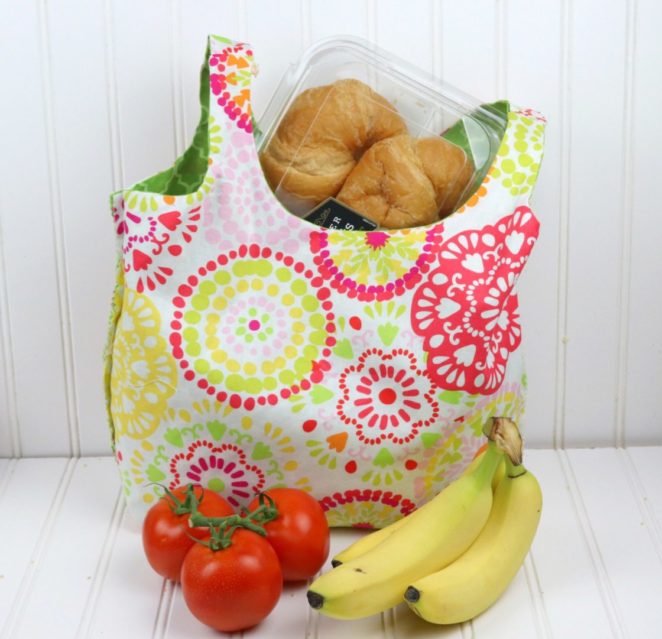
If you’re feeling especially crafty and generous, you can make matching or coordinating fabric produce bags.
Supplies
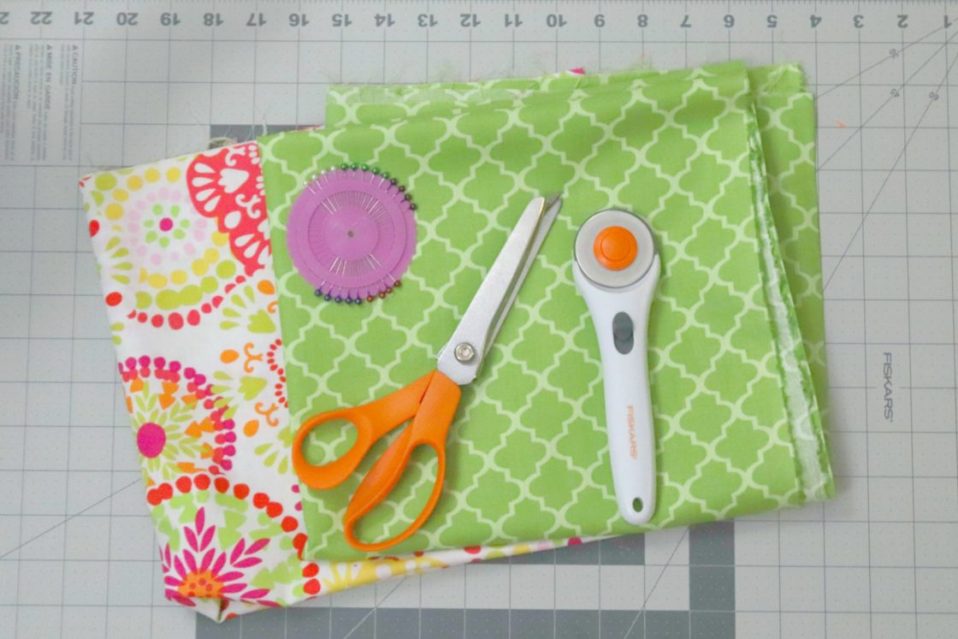
- 1/2 yard of your main cotton fabric – Amazon
- 1/2 yard of your complimentary cotton fabric – Amazon
- Washable fabric pen – Amazon
- Rotary cutting mat set – Amazon
- Scissors – Amazon
- All-purpose thread
- Wonder sewing clips or pins Amazon
- Sewing machine Amazon
**This pattern is based on a plastic shopping bag. The dimensions of that are 12 inches across and 22 inches high. To make your bag this size from the PDF template, you need to increase the size in your printer to 315%.
This will print on multiple pages, of which you will match the pieces and tape them together to make your pattern match the dimensions of the original size. With that said, you can make your shopping bag any size you like; just make sure your proportions are in line with the original**
Instructions
Step 1
Fold one piece of your fabric in half lengthwise. To ensure my cutting was even, I pressed the fold and pinned the opposite side together, keeping the material from sliding. Pin your template to the fabric and either trace or cut the pattern. Repeat with the other piece of cloth.
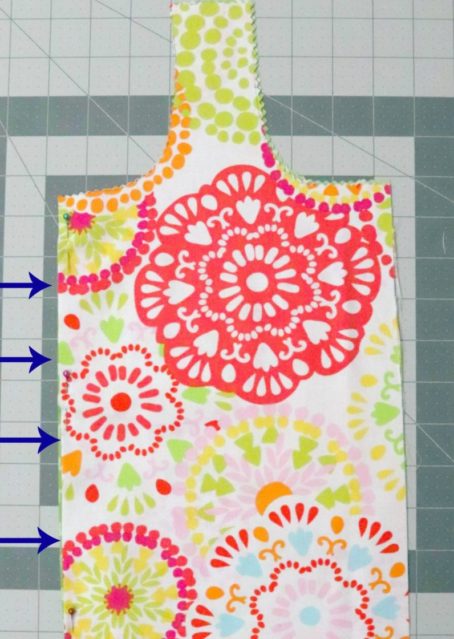
Steps 2-3

Open fabrics and place them together. Mark each corner 9” x6” (6” going horizontal and 9” going vertical) and cut.
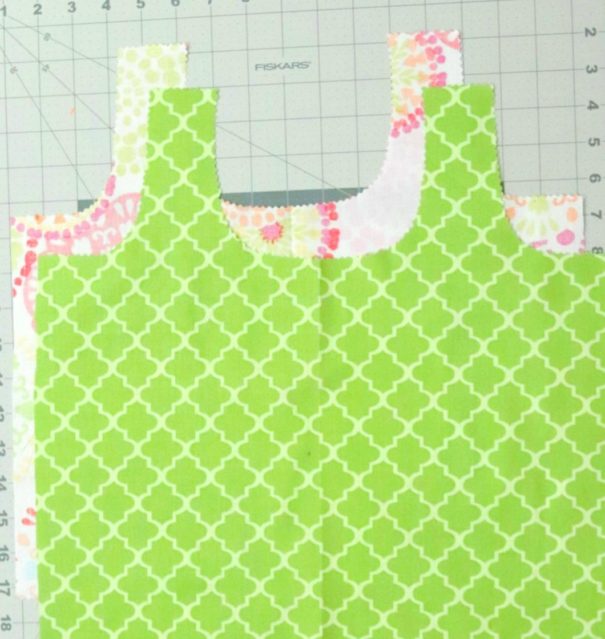
Step 4
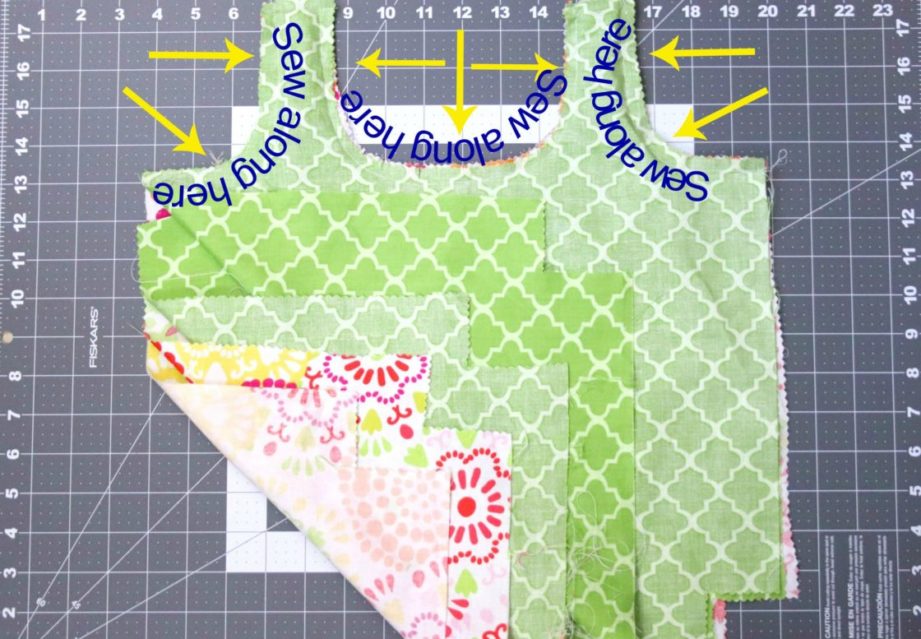
Place each set of fabrics right sides together. Sew each set along the curved sides, as shown in the photo. Carefully cut small notches along the curves, being careful not to cut through the seam. Press both pieces.
Step 5
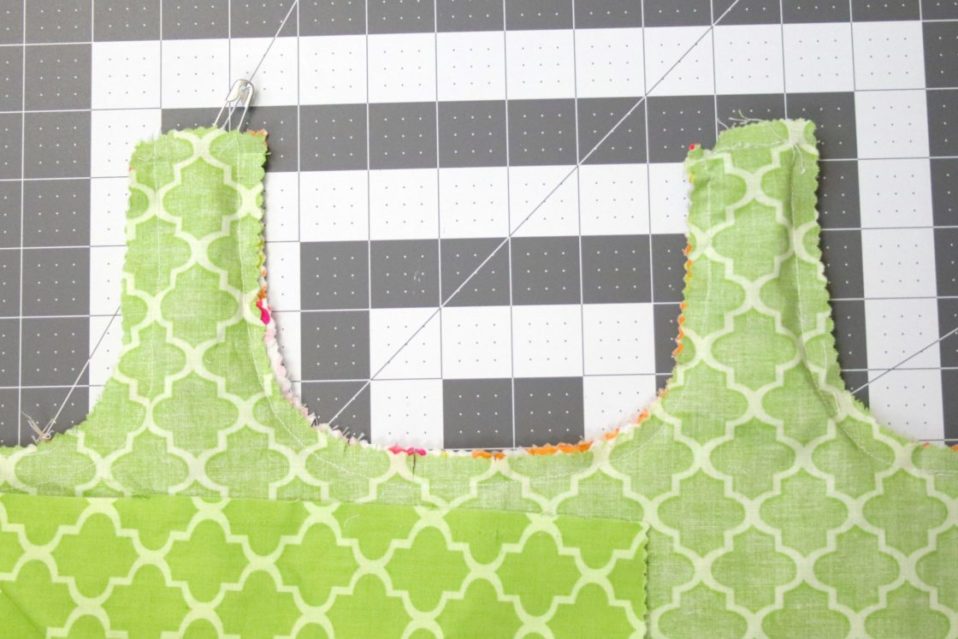
Open one set right side out (piece 1) and press. Using a safety pin, pin the top of each handle of piece 2 (as shown in the photo) and slide it into the handles of piece 1.

Step 6
Using the safety pin, pull each handle of piece 2 through the handles of piece 1 (like you would if threading cording through a hoodie, pants, etc.) until the openings of both sets of handles are flush with each other. Sew openings closed and trim, so they are even (mine was a bit uneven where the opening didn’t match exactly.)
Step 7
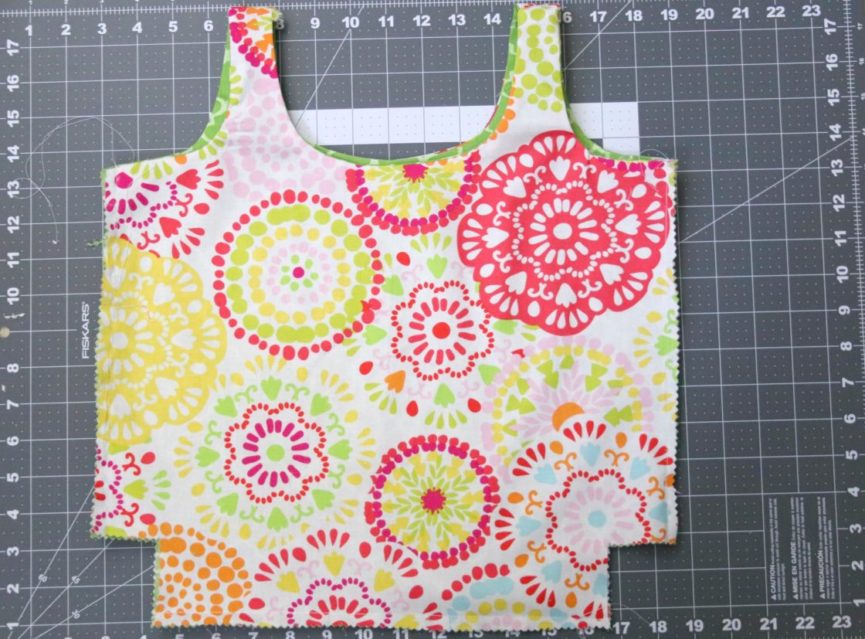
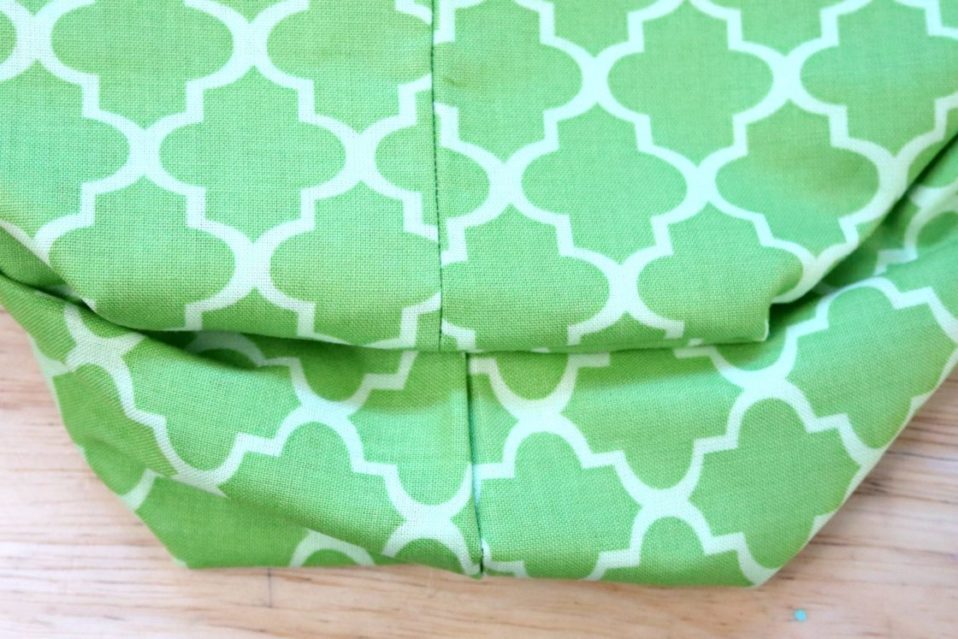
Turn piece two right side out. Fold pieces at the top fold and press (as shown in the photo.) Sew along the sides and the bottom, leaving the corners open.
Step 8
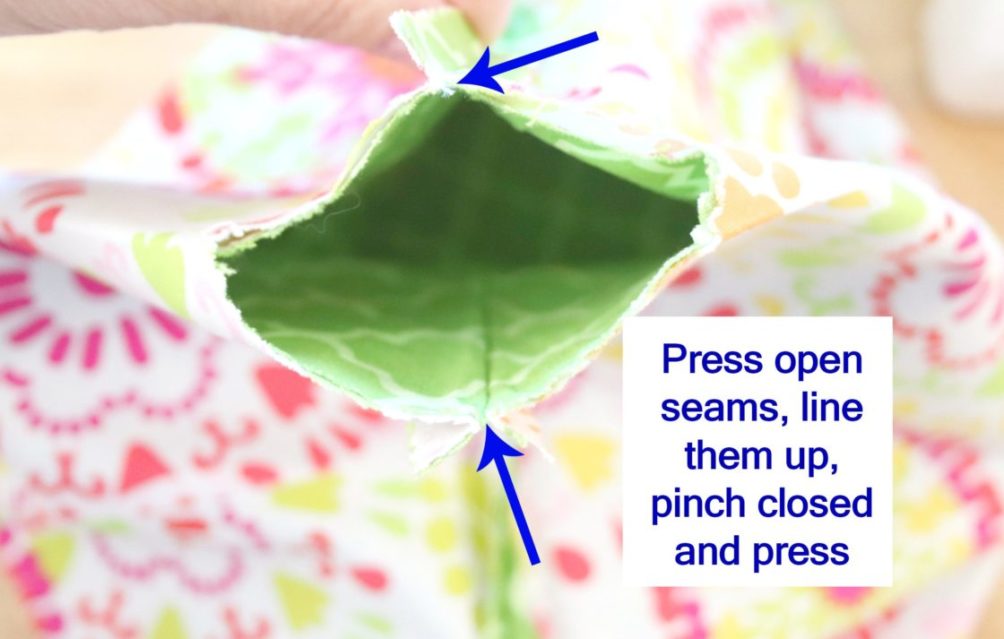
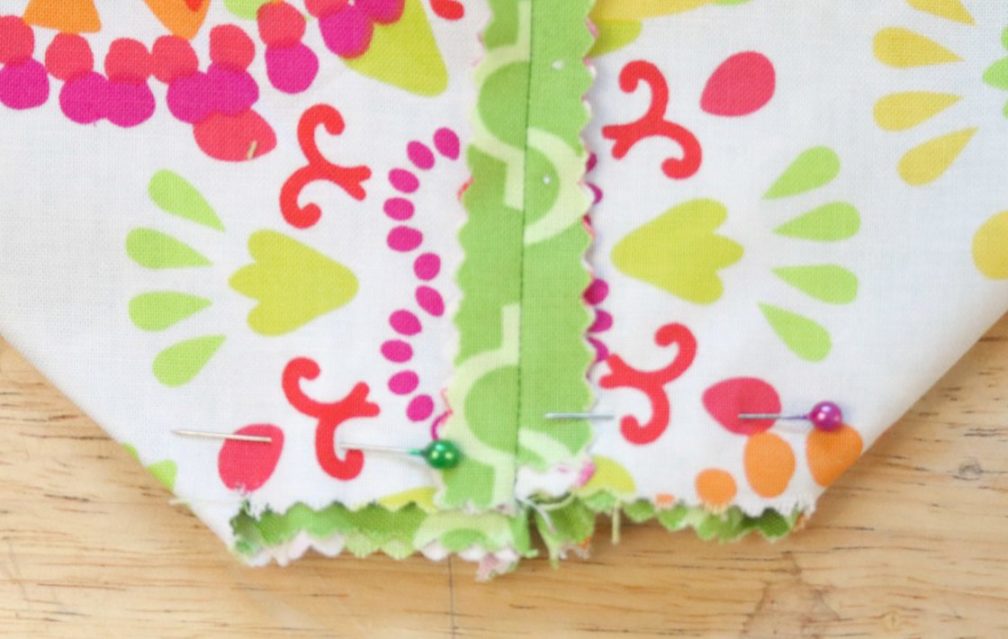
Turn the bag on its side and pinch the opening of the corner (as shown in the photo.)

Step 9
Close the opening, lining up the seams.
Step 10
Pin opening and sew. Go over the stitching a few times to reinforce it. To make your bag reversible, you can either trim the seams about 1/8” from the stitching. Or, you can serge the edges if you have the proper machine to do so.
Step 11
Turn the bag right side out. I used the blunt end of a pen to push the corners out.


