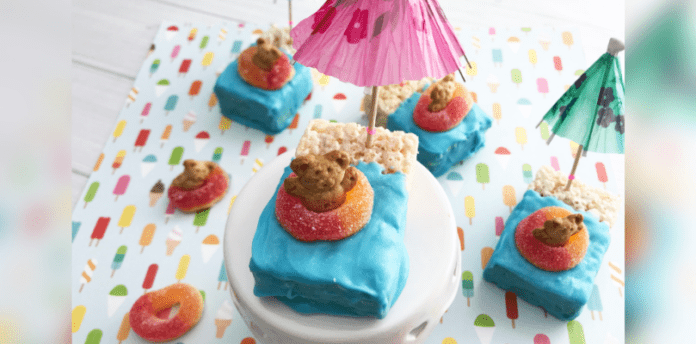
How could Rice Krispie treats possibly get any better? Why, by turning them into tiny beach scenes complete with sunshade and a teddy bear floating in the sea of course.
Regular readers will know that I am all about the quick and simple recipes and crafts so it should be no surprise that when I saw these super little floating teddy bear Rice Krispie treats, I was hooked.
With Gabriel being such an ardent lover of Rice Krispies, this is one cereal we never run out of. In fact, if we are down to just two family size boxes in the cupboard, that is considered a low stock. So there are always plenty of them to hand when we want to make Rice Krispie treats.
Having said that, there are times when cheating is preferable, and I have to admit that on this occasion it was a package of pre-made Rice Krispie treats which foromed the base of these dinky floating teddy bears.
We did stick to the original instructions for these, but if you were feeling especially artistic or crafty you could pimp them up with your own paper umbrellas and co-ordinated gummy rings to celebrate your little sports fan’s team, their favorite colour or something to co-ordinate with a TV show they love.
I have also seen these made by first dipping one end into yellow chocolate to give them more of a beach feel. The person in question went all out with their Floating Teddy Rice Krispie squares and created candy beach towels, sun glasses and footprints in the sand.
Personally, if I had that amount of time I would dedicate it to something that wasn’t going to disappear into my little monsters mouths 17 seconds after I had finished making them.
However
If you do make these and choose to go the extra steps, please share your pictures with me on Facebook. I always love seeing what my creative readers can do.
Ingredients
- Either, an 8 count package of Kellogg’s Rice Krispie Treats OR your own, homemade treats
- 8 Teddy Grahams (plus a few extra to munch on)
- 8 Gummy rings (I used peach flavor)
- 12 ozs of Wilton Turquoise candy melts
- 8 Small drink umbrellas
Directions
- Line a small baking sheet with wax or parchment paper.
- Open all 8 Rice Krispie treats and discard the wrappers.
- Place the treats on the baking sheet and set in the fridge 20 minutes to firm up (they are easier to work with once firm with the melted chocolate).
- After 20 minutes, pour the Wilton candy melts into a microwave safe dish and heat in the microwave in 30-second increments, stirring occasionally until melted.
- Take one treat at a time and dip it into the melted chocolate. Use a spoon to coat about 3/4 of the treat and allow the extra chocolate to drip back into the bowl.
- Place the treat on the baking sheet.
- Use a small paring knife to carefully cut off the bottom half of the teddy bear’s body. Do not worry. The teddy won’t feel a thing.
- Place the Teddy Bear in a gummy ring and set on top of the Rice Krispie treat.
- Repeat this process with all the treats.
- Once the melted chocolate has set, give each treat a cute little umbrella to shade your teddy from the sun.
If you found this Pinteresting, perhaps you would like to share, or maybe Pin it for later.


