

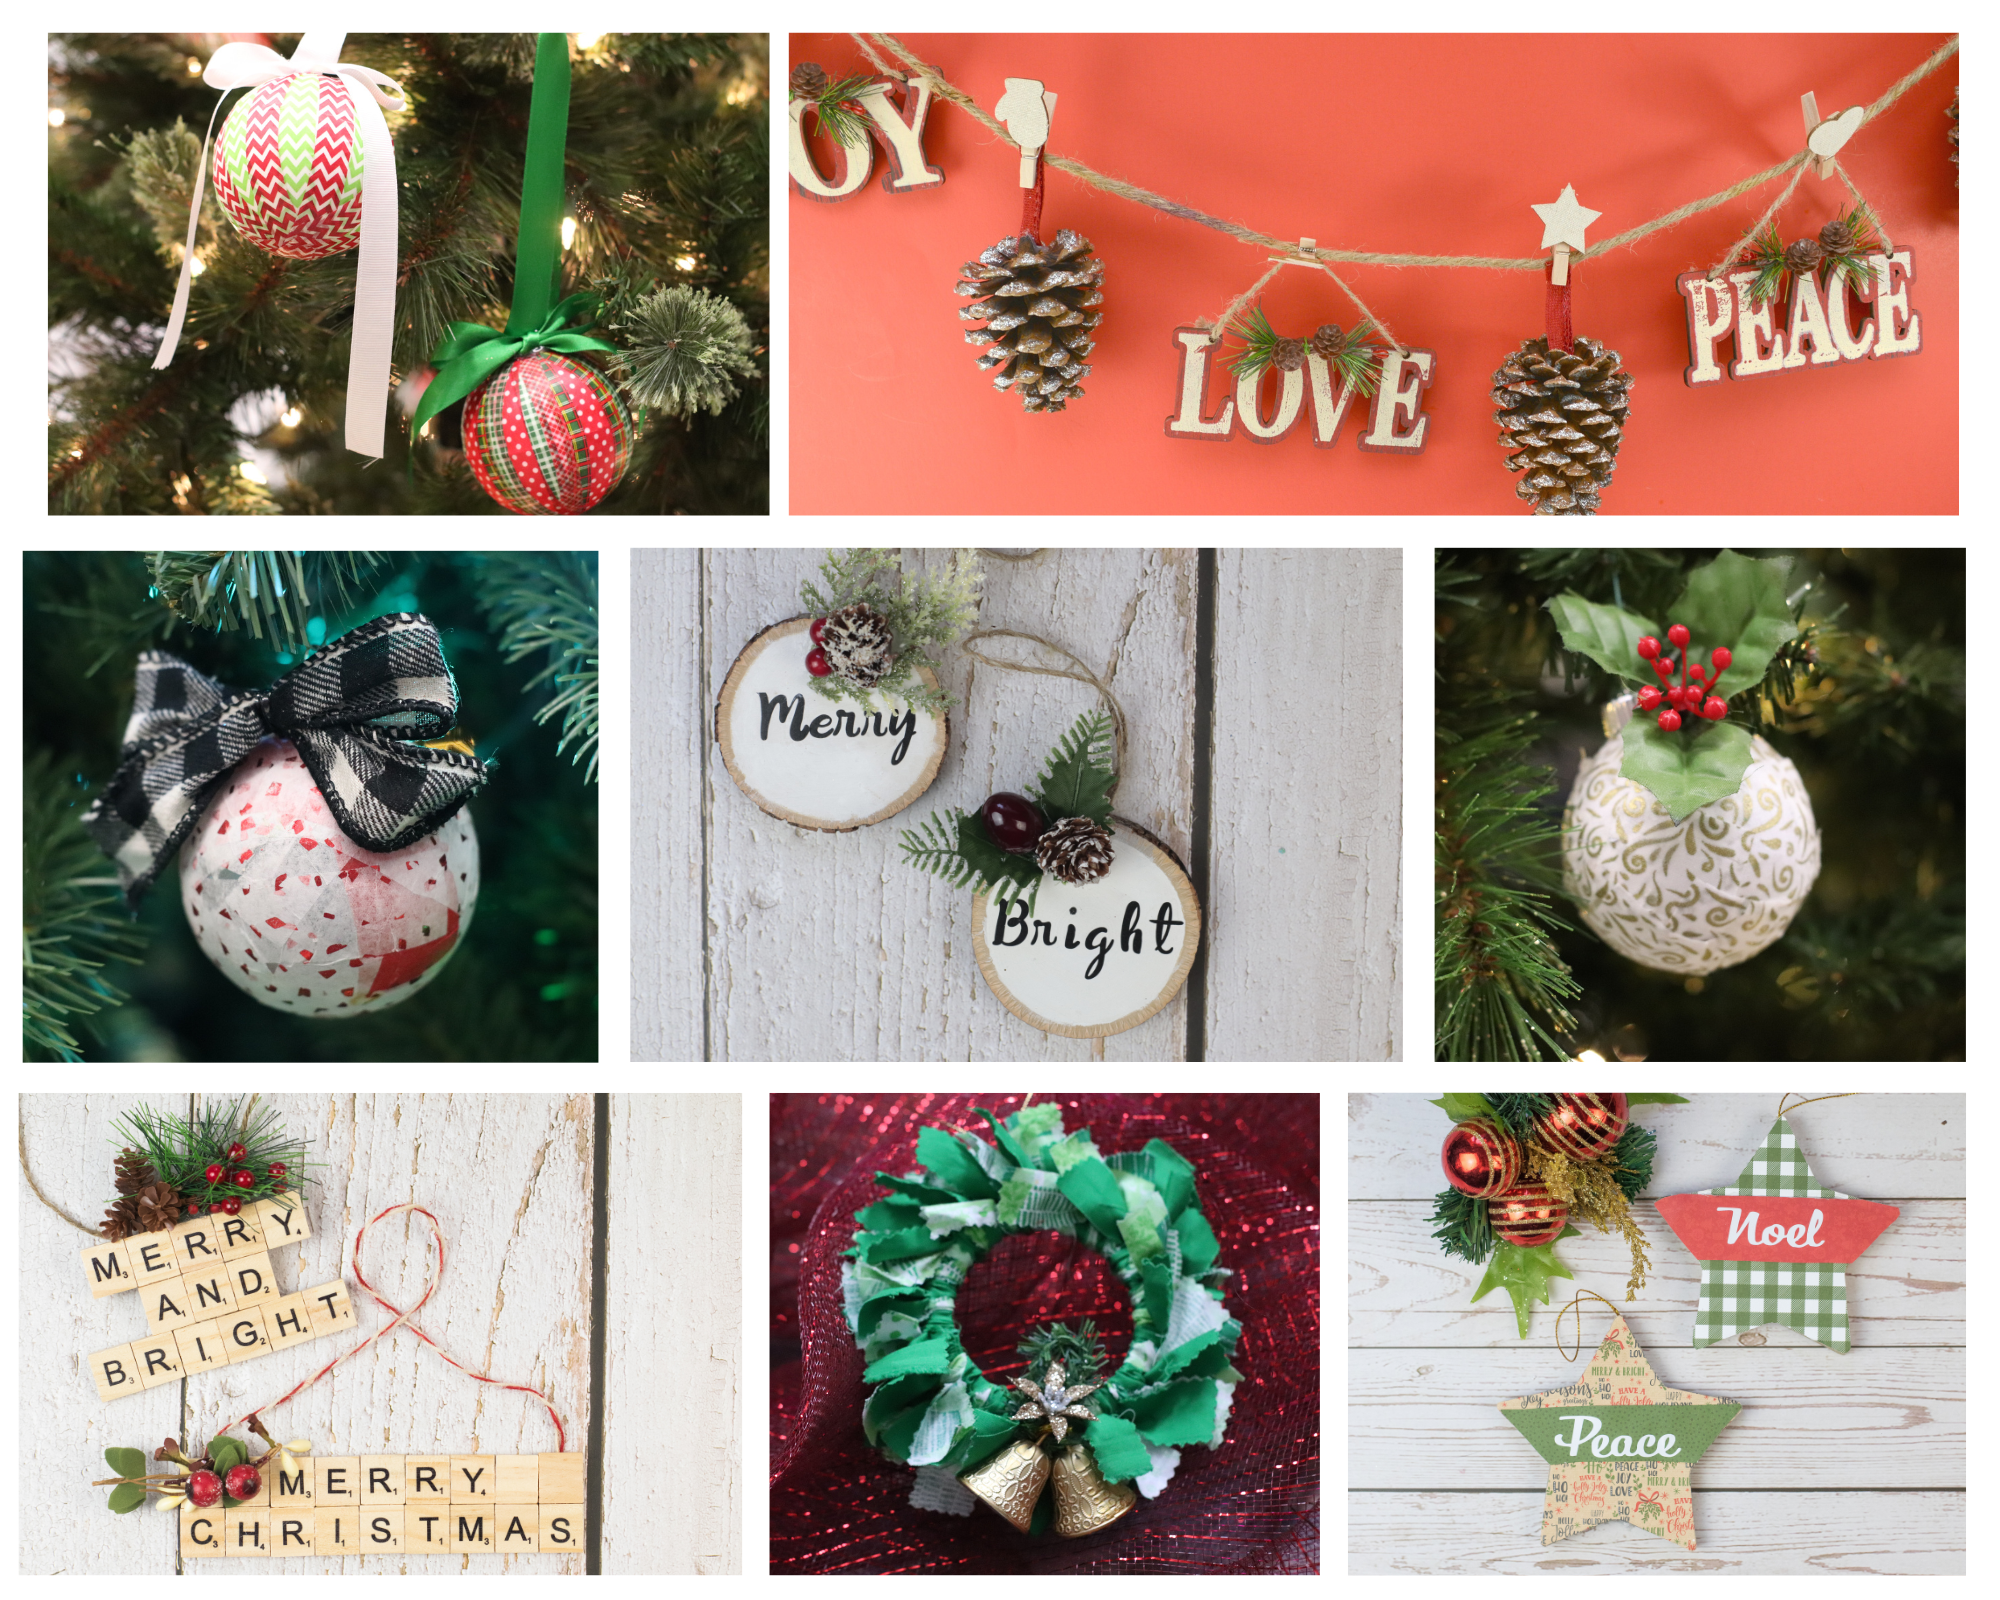
’Tis the season for last-minute holiday chaos! If you’re struggling to come up with fun and festive decorations for your home, never fear. We’ve compiled a list of easy and creative Christmas crafts that your kids will love to help with. These quick and simple projects will add some cheer to your home and keep your little ones entertained during the holiday break. So grab some craft supplies and get ready to deck the halls with these last-minute Christmas decoration crafts for kids.
#1 Washi Tape Ornaments

Supplies:
- Styrofoam ball(s)
- Washi tape
- Floral pins or “T” pins
- Ribbon or twine
- Glue Gun
Instructions
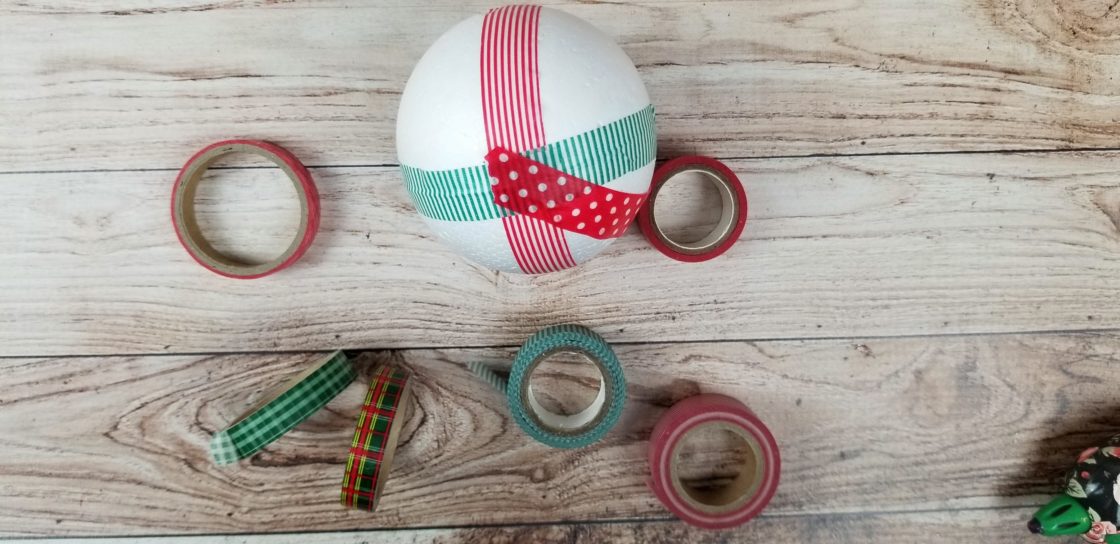
Step 1: Starting with your first roll of washi tape, attach it to your styrofoam ball. I start mine at one end and wrap the tape around the perimeter of the ball, meeting where I began. Tear off the tape. Repeat with as many colors/patterns as you like until the ball is covered.
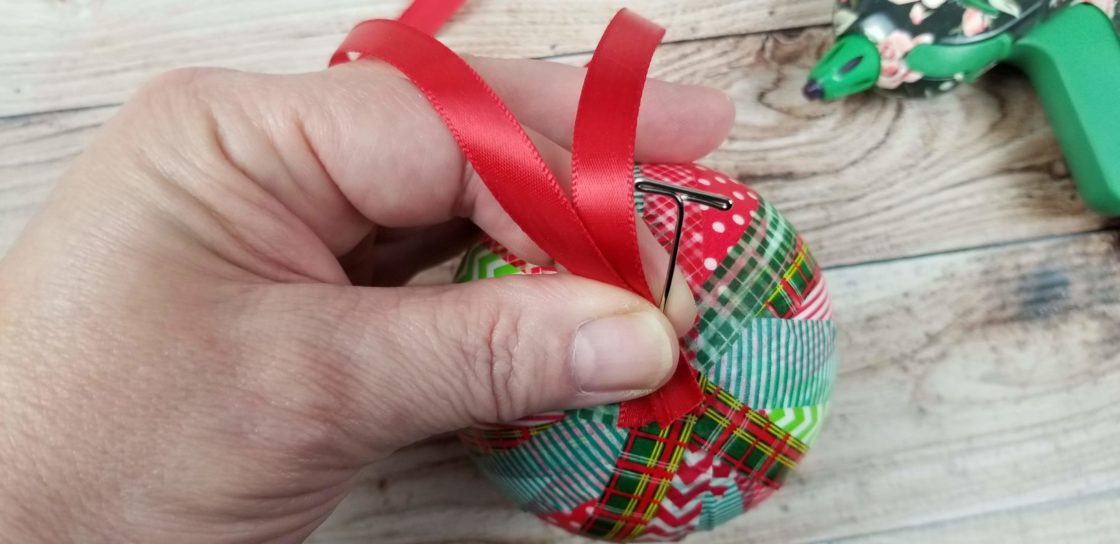
Step 2: Cut a length of ribbon and form a loop. Secure to the top of the ball with the “T” pin.

Step 3: Cut another length of ribbon and tie a bow. Using the glue gun, attach the bow to the ball, covering the “T” pin.
Hang on your tree and enjoy!
#2 Scrapbook Paper Mache Stars
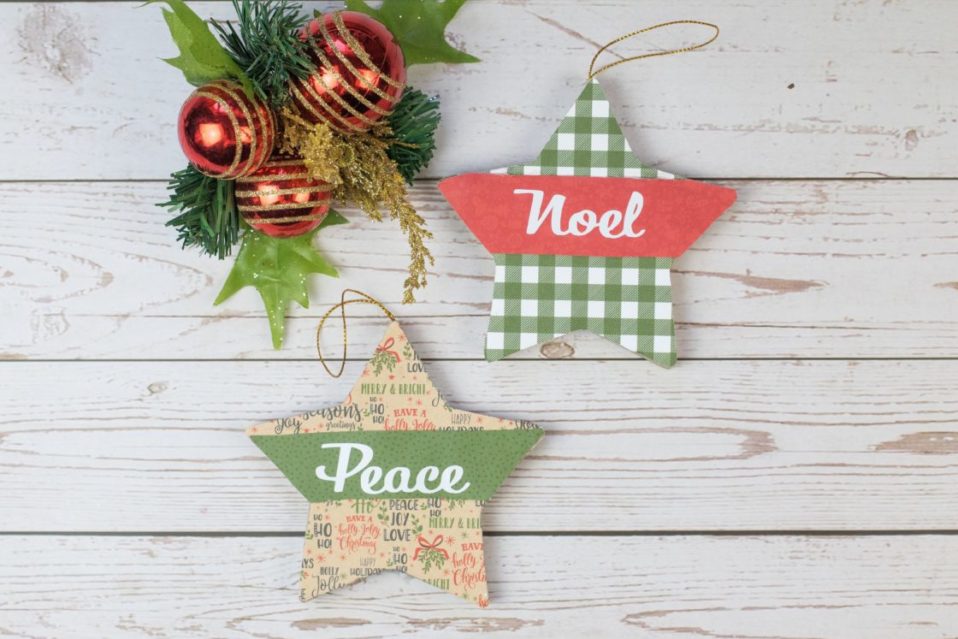
Supplies:
- Paper Mache Star Ornament
- Christmas Scrapbook Paper
- Pencil or pen
- Craft scissors
- Glue Gun
- White school or Tacky glue
- Option 1 – Use pens for the wording
- Option 2 – Use a cutting machine for the words
- Cricut machine
- Cricut removable vinyl
- Cricut transfer paper
- Cricut weeding tools
Instructions
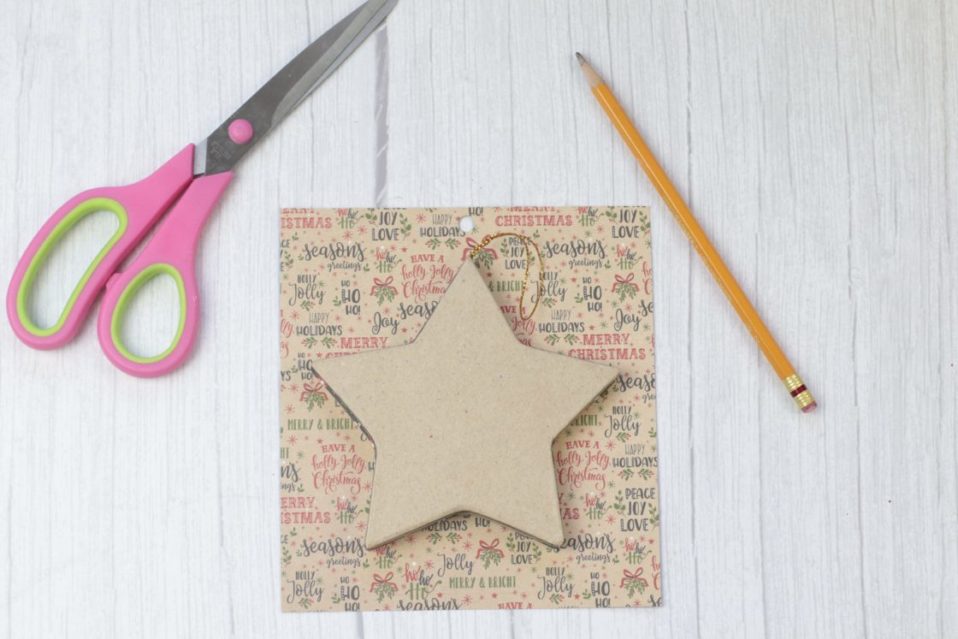
Step 1: Trace your star onto your scrapbook paper and cut it out with your craft scissors.

Step 2: Using your glue gun, White school, or Tacky glue, attach it to the paper mache star ornament. Allow to dry.
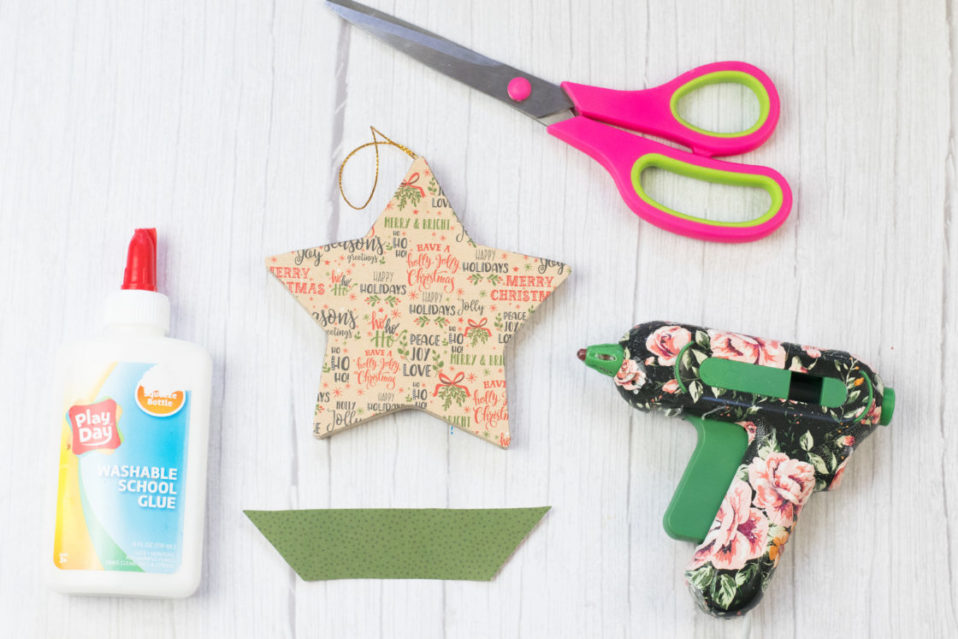
Step 3: Choose a coordinating piece of scrapbook paper and trace your star onto it as well. Cut it so that it runs horizontally from two side points of the star and is about 1” vertically. Using your glue gun, White school, or Tacky glue, attach it to the paper mache star ornament. Allow to dry.

Step 4: Set up your Cricut machine and cut vinyl letters for your chosen Christmas message.

Step 5: Using your weeding tools, peel up your vinyl letters and apply them to the transfer paper/tape.
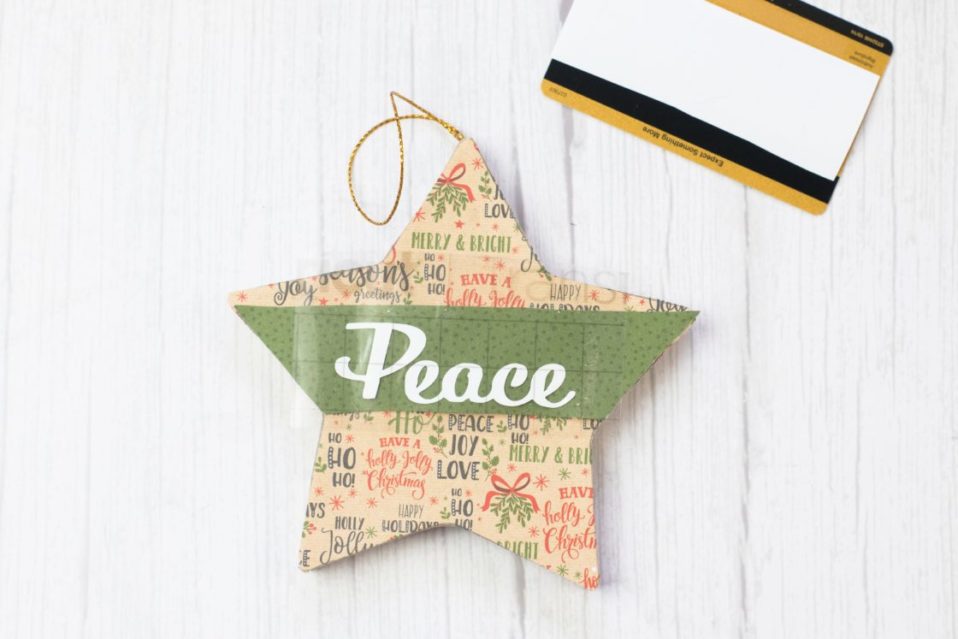
Step 6: Line up your word on the transfer tape onto your coordinating scrapbook paper piece in the center of your ornament (which you applied in step 3), and using your rubbing tool or credit card, etc., apply the word to the decoration. Hang on your tree and enjoy!
Alternatively, have your little ones write their Christmas message on the ribbon strip.
#3 Mason Jar Ring Fabric Tie Ornaments

Supplies:
- 1/8 yard of cotton fabric
- 2 – 4 Mason jar rings
- Scissors or rotary cutter
- Glue Gun or Floral pins (You can find them on Amazon)
- Ribbon or twine
- Decorative embellishments (optional)
Each 1/8 yard of fabric will cover two rings
Instructions:

Step 1: Cut your fabric into 1” wide x 7” long. I used a variety of color combinations. If you do this, choose 1/8 yard of each color you want.
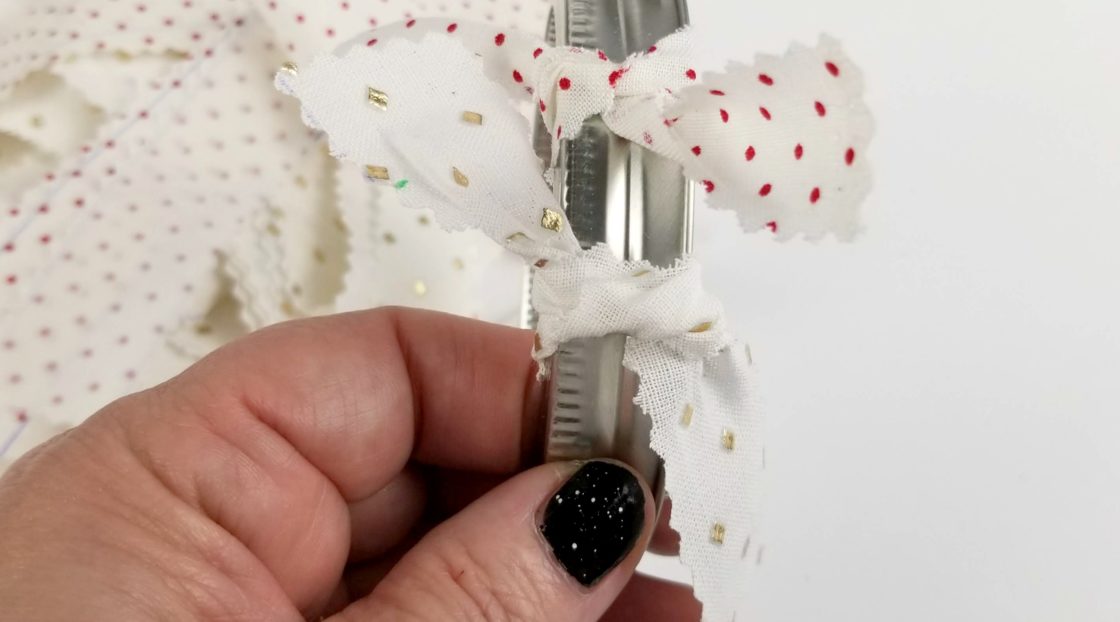
Step 2: Wrap the fabric strip from the inside and tie in a knot around the outside of the ring.
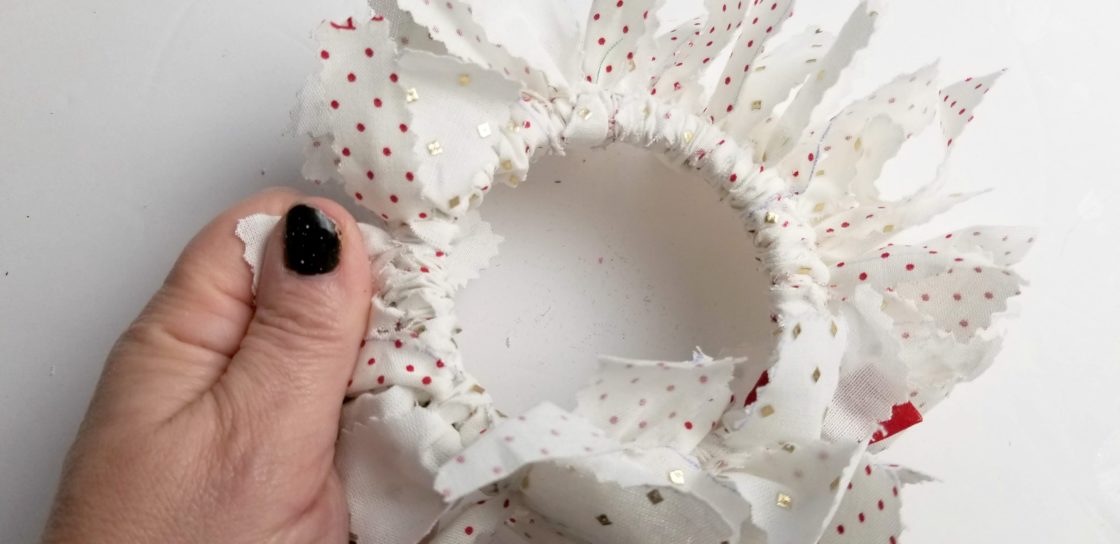
Step 3: Continue to tie strips until the ring is full.
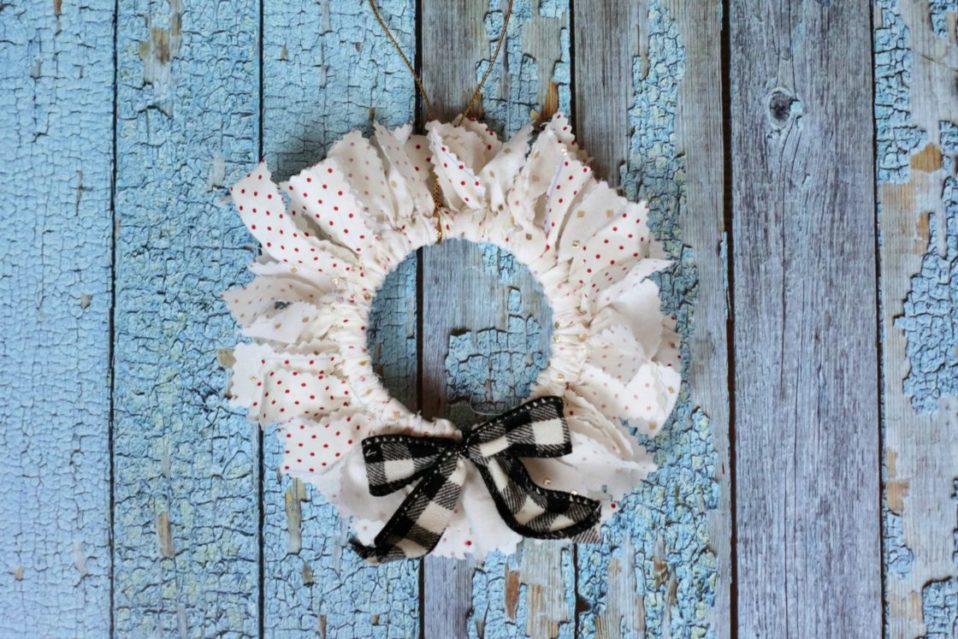
Step 4: Cut a length of ribbon or twine to serve as your hanger and tie it around the ring at the top. If you like, glue a decorative embellishment.
#4 Decoupage Round Glass Ornaments
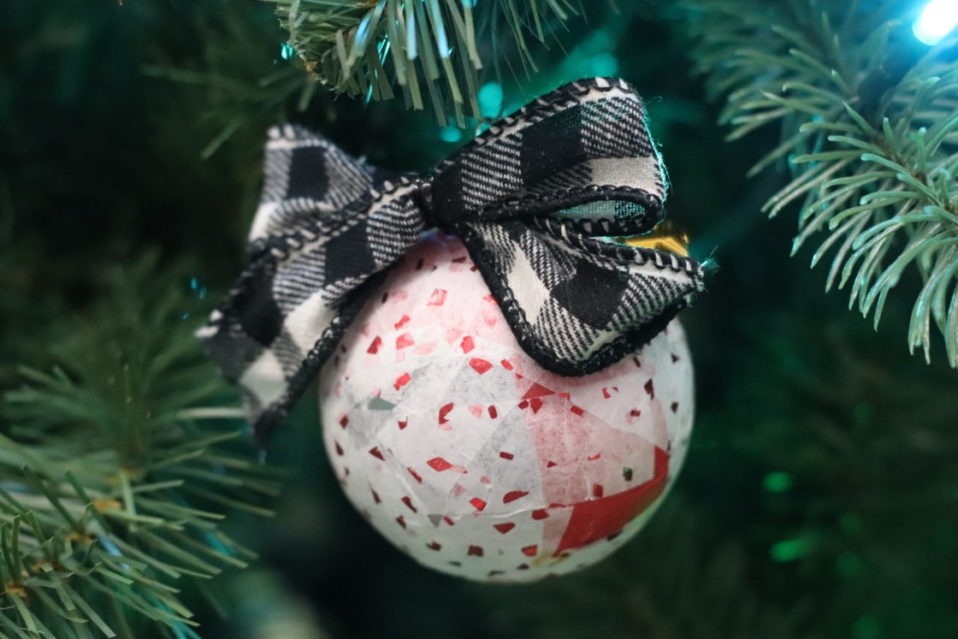
Supplies:
- Round glass or plastic ornament
- 1” fabric squares
- Mod podge
- Foam brush
- Glue gun
- Decorative embellishment, if desired
Instructions:

Step 1: Apply the mod podge in small sections on the ornament. Attach the fabric squares.

Step 2: Repeat the process until the ornament is covered. Allow to dry completely.

Step 3: Apply a second coat of Mod Podge and allow it to dry overnight.

Step 4: If desired, apply decorative embellishment with the glue gun.
#5 Rustic Pinecone Garland

Supplies
- Pinecones
- Silver glitter paint
- Paintbrush
- Hot glue gun
- Red ribbon
- Small holiday-themed clothespins
- Rope or twine
- Scissors
- Rustic holiday ornaments (optional)
Instructions:
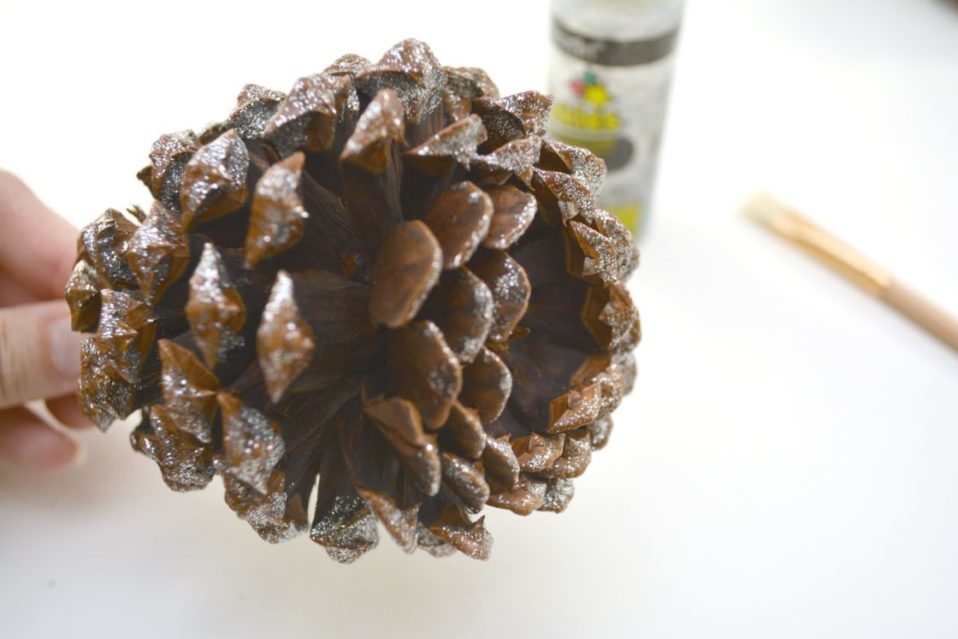


- Begin by holding your pinecone upside down by the tip and painting the edges of the pinecone with silver glitter paint. Lay the pinecones down gently on a protected surface and allow them to dry completely.
- Once dry, cut a small loop of red ribbon (we used burlap), and glue it to the bottom of the pinecone, which will actually be the part that faces up on the garland. There is usually a small notch there that you can glue the ribbon to. You can see the photo for reference on how to do this.
- Cut a length of twine or rope that is as long as you would like your garland to be.
- Alternate hanging the painted pinecones along the length of the rope or twine with small holiday-themed clothespins. If you cannot find the clothespins, you can make your own out of regular-sized clothespins or simply hot glue the pinecones directly to the rope or twine by its ribbon hanger.
- You can boost the rustic look of your pinecone garland by alternating other inexpensive rustic holiday ornaments among the pinecones on the garland. The ones used here were found at Dollar Tree.
#6 Rustic Farmhouse Wooden Disc Ornament Craft
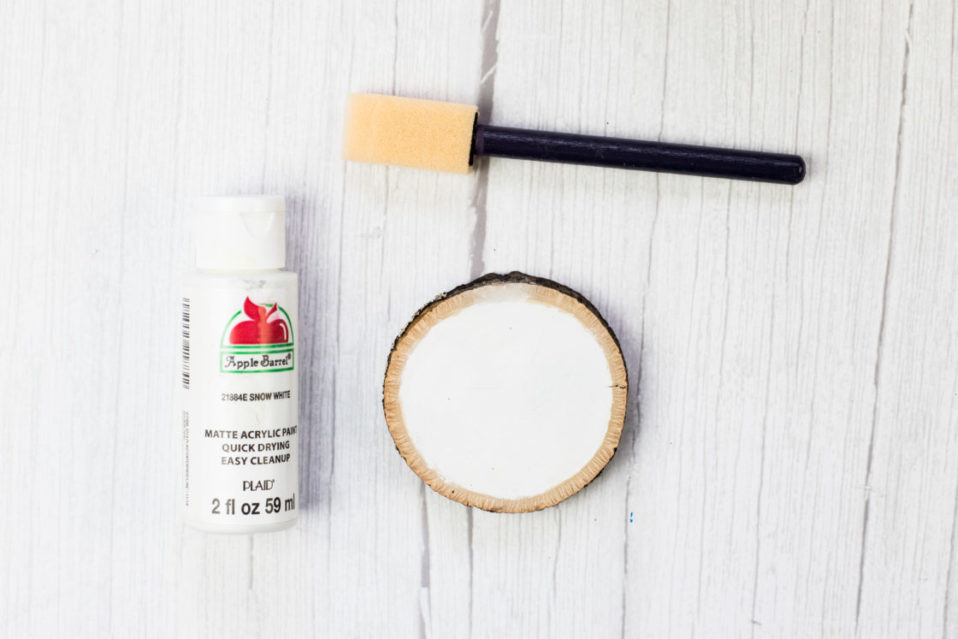
Supplies
- Wooden discs
- White acrylic craft paint
- Craft brushes
- Floral wire cutters
- Craft scissors
- Holiday greenery
- Glue Gun
- Twine
- White school or Tacky glue
- Cricut machine
- Cricut removable vinyl
- Cricut transfer paper
- Cricut weeding tools
Instructions:
Step 1: Using your foam craft brush, paint your wooden disc with your white craft paint. Allow to dry completely. We applied two coats to give ours a bright white appearance 😊

Step 2: Set up your Cricut machine to cut some holiday themed text and cut into your vinyl.

Step 3: Using your weeding tools, peel up your vinyl letters and apply them to the transfer paper/tape.

Step 4: Center your word on the transfer tape onto your wooden disc (which you applied in step 3), and using your rubbing tool or credit card, etc. apply the word to the ornament.

Step 5: Using your Glue gun, school glue, Mod Modge or Tacky glue, add your holiday greenery.

Step 6: Turn the disc over and secure the tie. Allow the glue to dry completely before hanging it on your tree. Hang on your tree and enjoy!
#7 Scrabble Tile Ornaments

Supplies:
- Scrabble Tiles
- Twine
- Holiday greenery
- Glue gun, super glue, school glue, or Tacky glue
- Scissors
Instructions:
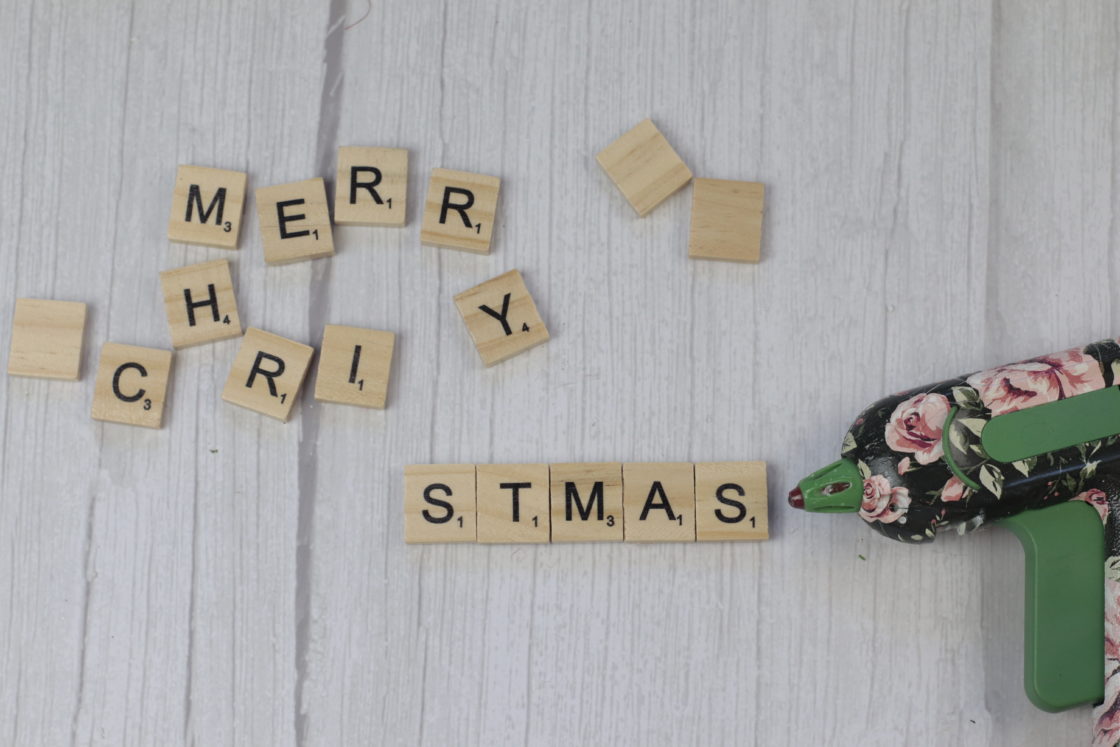
Step 1: Once you choose your word(s), using you’re glue gun, school glue, or Tacky glue, attach your Scrabble tiles. You want to attach them side by side, working from left to right. If you are using the school glue or Tacky glue, be sure to wait until the glue is completely dry before you move on to connecting the next tile. To be sure your tiles are straight, you may want to make a straight line to line them up one 😊

Step 2: Once the words are completely connected and 100% dry and secure, connect vertically. Allow it to dry completely.
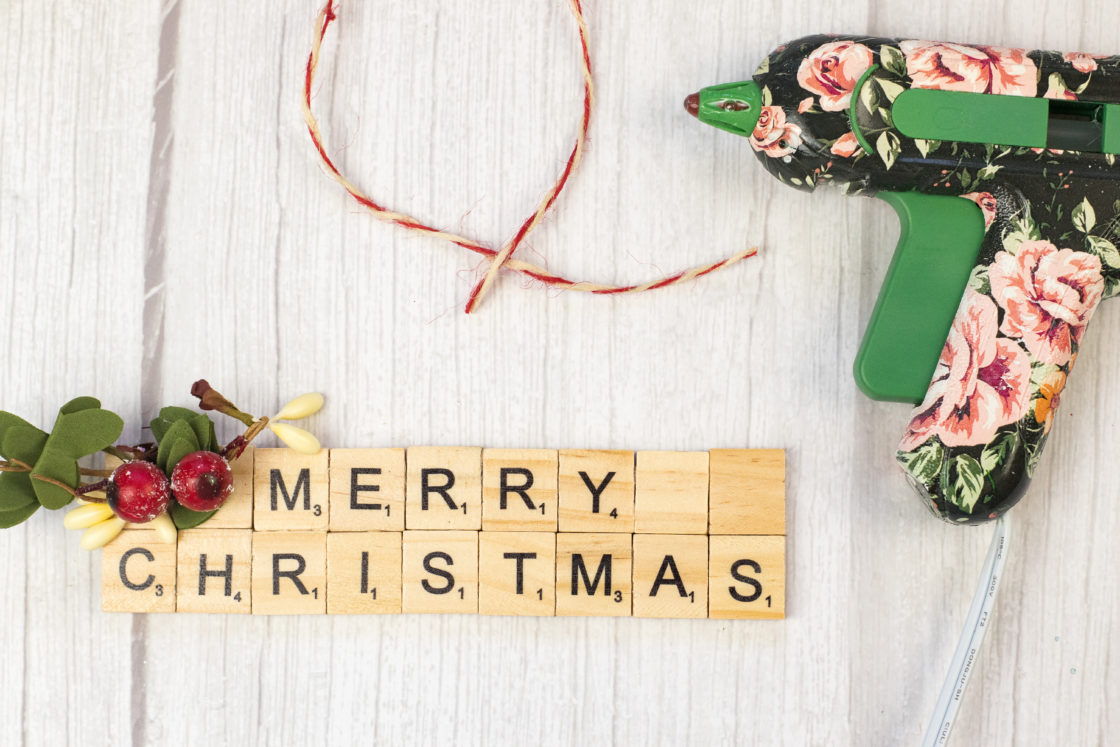
Step 3: Using your Glue gun, super glue, school glue, or Tacky glue, apply your embellishments.
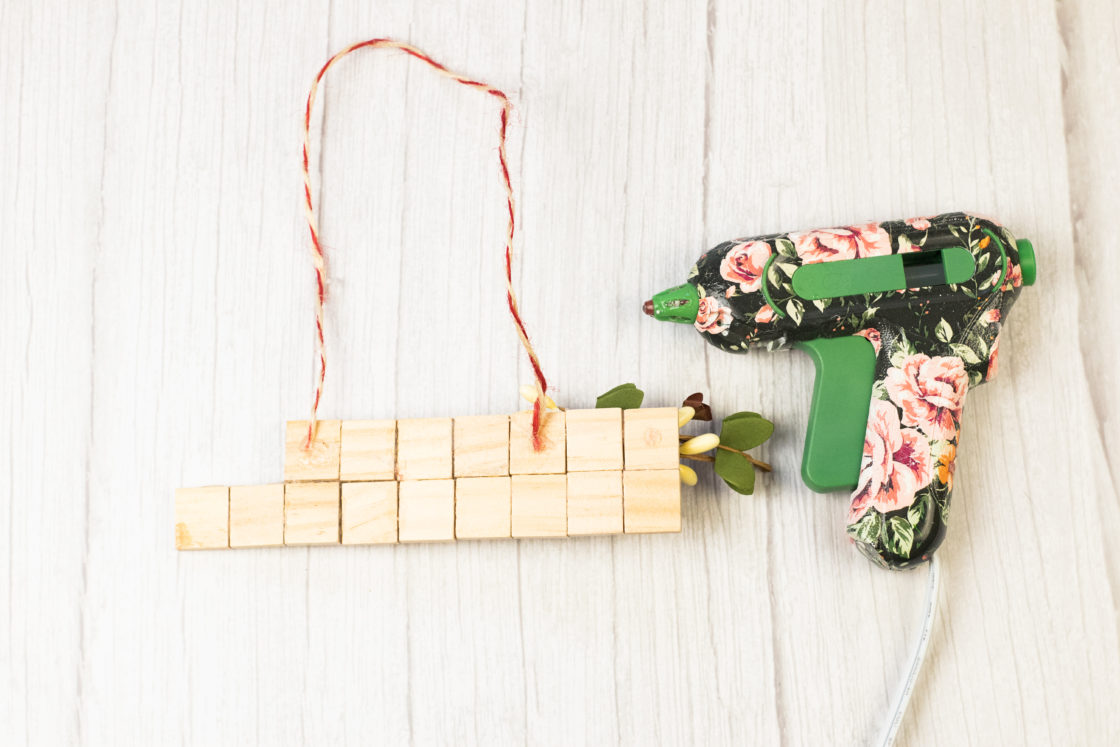
Step 4: Cut a length of twine to hang the ornament. Turn the stick over and secure the twine. Allow it to dry completely before hanging it on your tree. That’s it!!! This could not be any easier or more adorable!!
