


As you may have noticed from my posts this week, the littles are enjoying ‘Dragons – Race to the Edge’ on Netflix. Today I would like to share with you, how to make an Astid costume. Astrid is Eveys favorite character in the Dragons films and series. Astrid is portrayed as an intelligent, self assured, confident and competitive teen. With a strong sense of duty, she will stop at nothing to defend those she loves and says things such as ‘It’s no fun unless you get a scar’ ! It’s no wonder Evey feels an affinity with her.
So we decided Evey could dress up as Astrid and we set about studying her outfit.
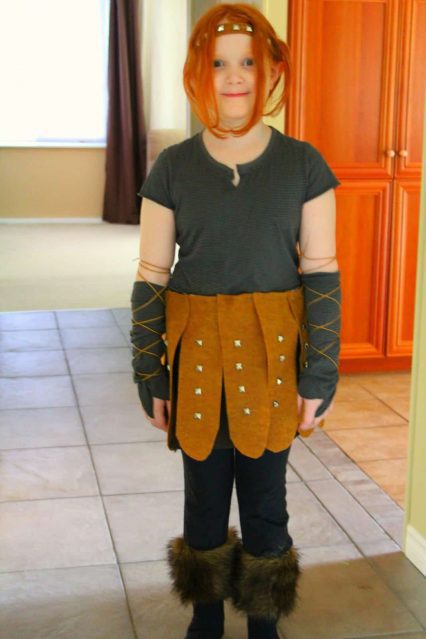
Working with what we had to hand we had to make a couple of compromises (much to Evey’s disgust!). We didn’t have a stripey green t-shirt, so we used a black & gray one, and I decided that spikes like the ones on Astrid’s skirt were not really child-friendly, so we went with studs, but apart from that, we stayed pretty true to her picture. We even did Evey’s hair with a side braid and bindings.
Her brother James suggested she should dye her hair blonde (he was only joking!) and she said “No- my red hair is beautiful and I will never dye it another colour. Glad to see she is self-confident too.
So, how did we make the costume? Here’s how.
Materials
- One stripey long sleeved t-shirt
- One pair of dark leggings
- One old skirt or pair of shorts
- One pair of long dark socks
- 6 A4 sheets of dark brown felt
- 6 A4 sheets of mid-brown felt
- 1 pack of mid brown binding
- 90 studs or stud shape beads or buttons
- 2 A4 sheets of foam board
- 1 pack of air dry clay
- white paint
- black paint silver paint
- scissors
- glue gun
Instructions
- Stretch the waist band of your shorts / skirt as far as it will go.
- Glue the dark brown felt sheets around the waistband, overlapping each sheet by about 4 inches.
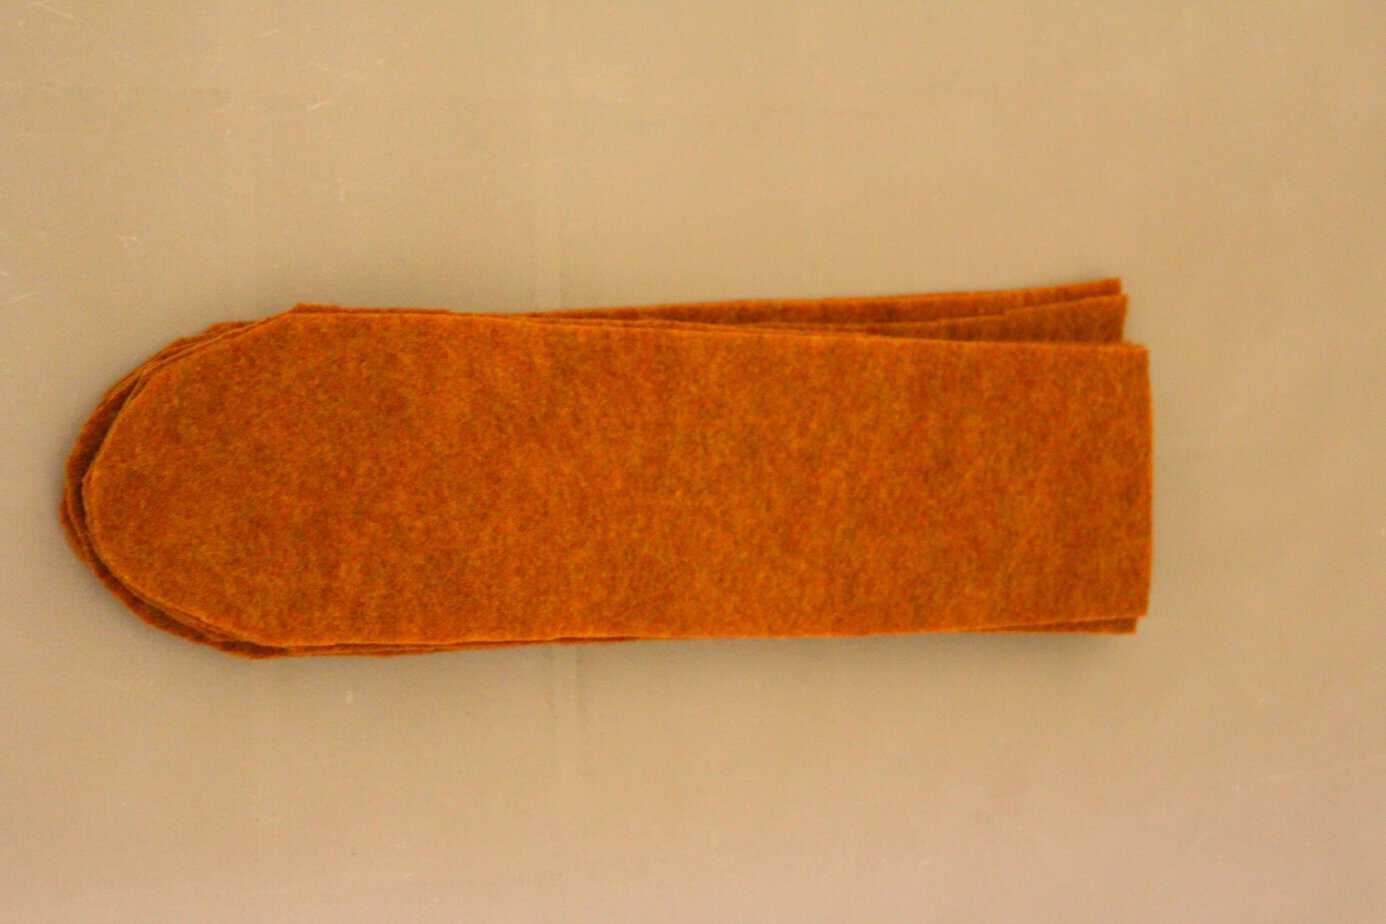
- Cut 5 of the mid brown sheets into three strips each.
- Round the ends of the strips.

- Glue the strips onto the waist band and then glue four studs onto each strip.
- Now cut the sleeves off of your long sleeved t-shirt and cut a straight line, downwards about an inch in the center of the neck line.
- Cut a hole into the ends of the sleeves so your little Astrid can hook their finger through.
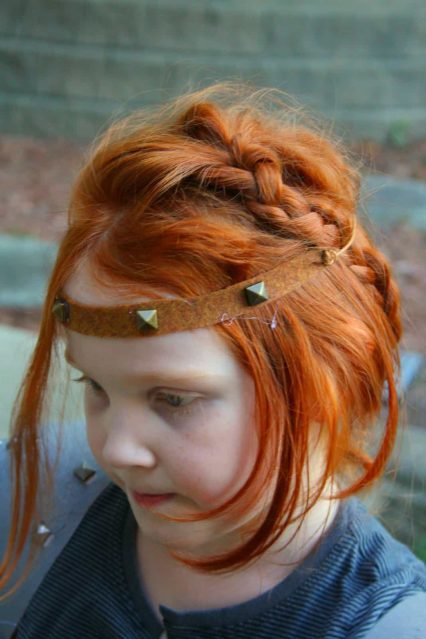
- Cat a strip of felt to fit for your headband glue studs.
- Use the binding to wind up ‘Astrids’ arms and secure the arm bands.
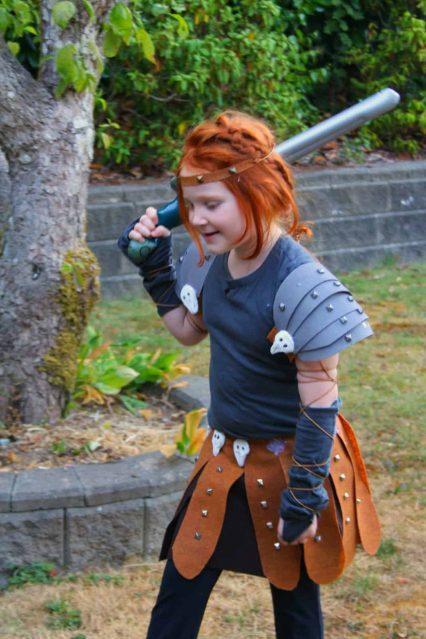
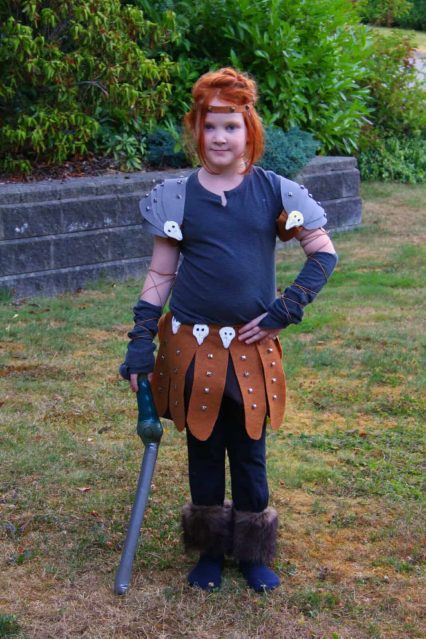
- Glue s strip of fur around the top of the socks and you should have something that looks like this:
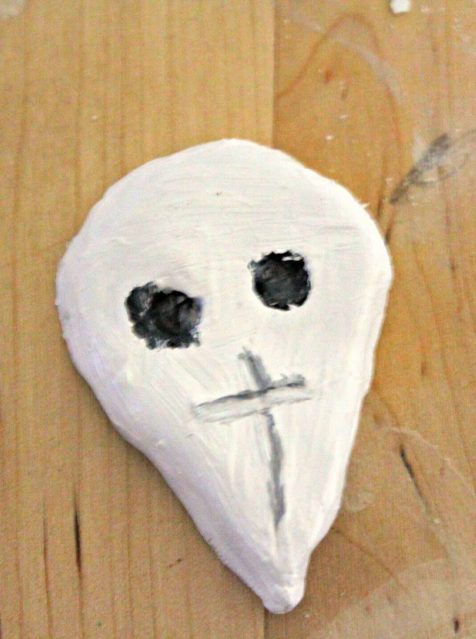
- Now use the clay to make the skulls. I did this by making a small ball of clay, squashing it flat and then pinching one side into an almost pointed tip. We used the end on a pencil to make the eye holes and cut a rough cross into the ‘beak’. You will need one skull for the join at the top of each strip on the skirt, plus two for the shoulder amour.
- Once the skulls are dry, paint them white (a rough paint job looks better) and highlight the eyes & beak cross in black.
- When dry, glue the skulls to the skirt.
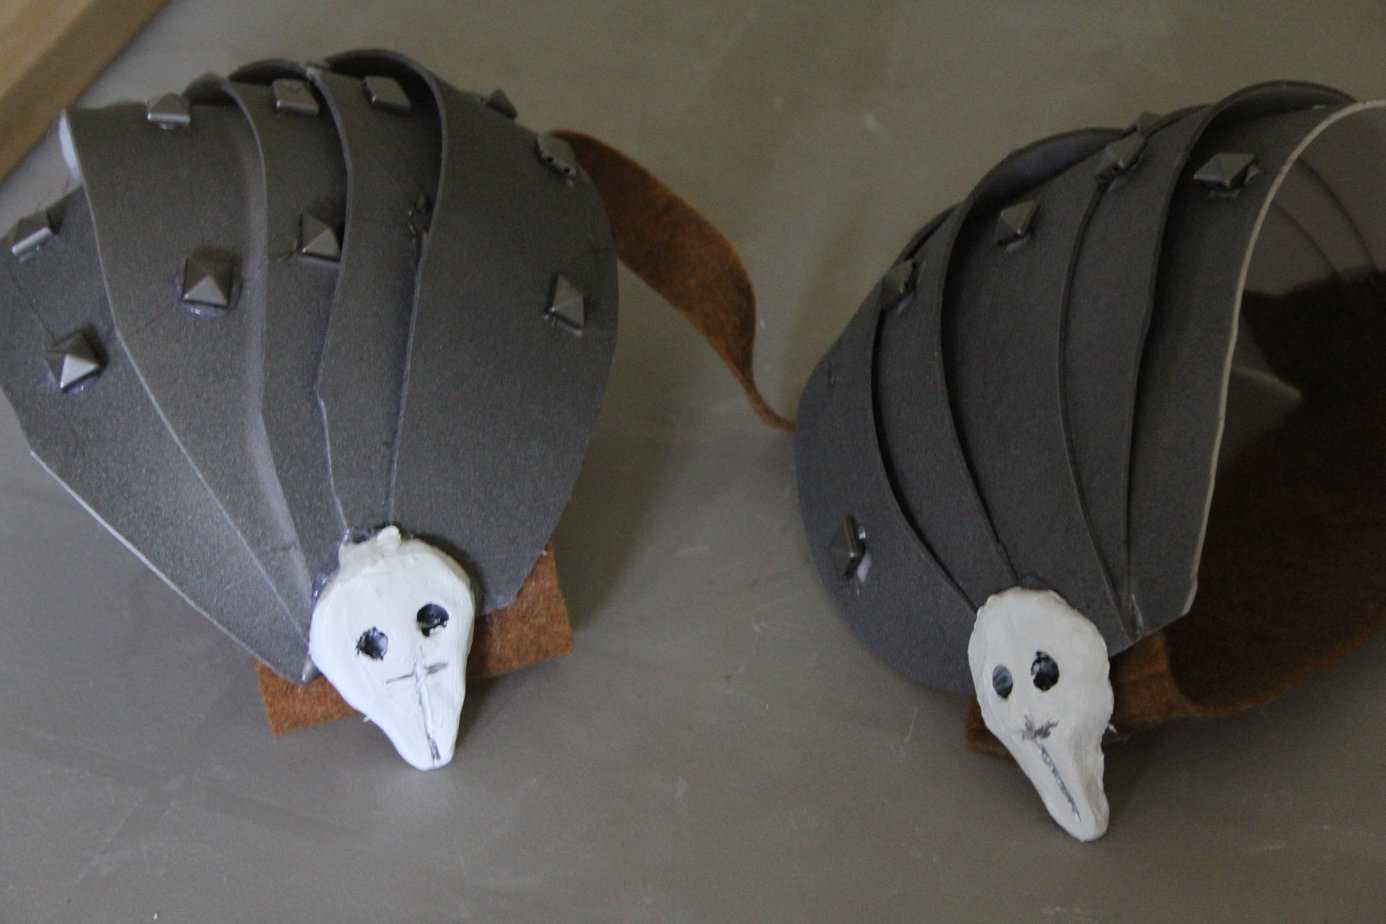
- To make the armor, cut ten strips from the foam board. Make them slightly curve and approximately 2 inches wide.
- Glue four studs to each strip, bend the strips over and stick them together to form a curved shell.
- Spray the shoulder plate silver.
- Glue a skull to the point the strips overlap.
- Use a strip of felt to connect the two shoulder plates
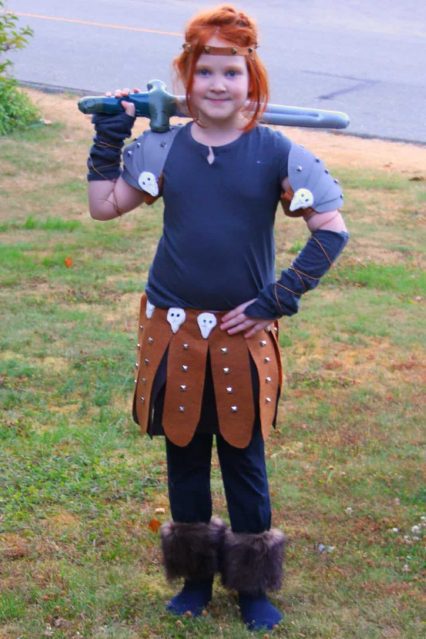
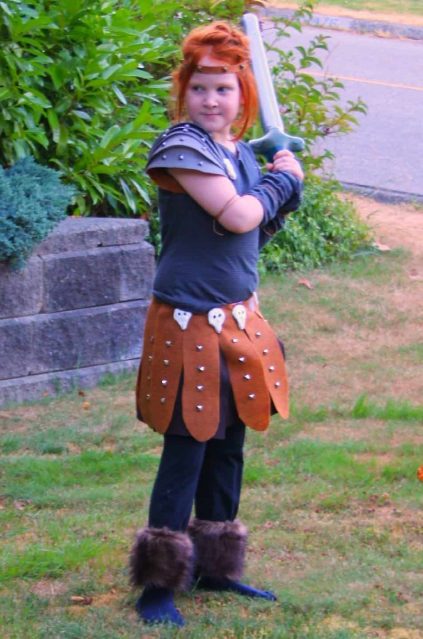
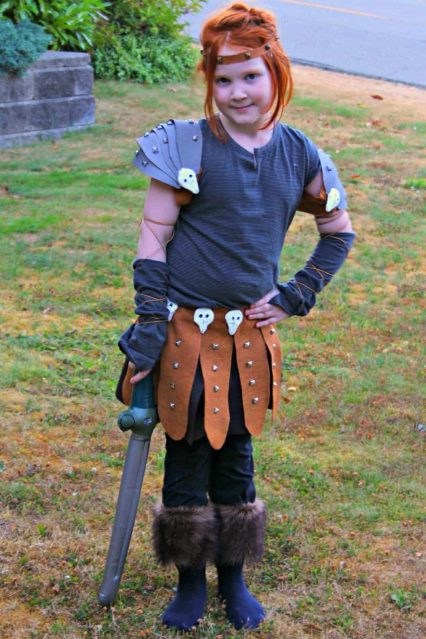
You now have all of the pieces of your costume and put together it should look something like this:


This is a great costume. My kid loves the look of it, so I think I’ll give it a go!
I am so loving this and great that you put everything out there so we can easily help our children or in my case my grandchildren make one. I know my grandgirls would love this 🙂 and that little girl who is fashioning all this off is just too cute 😉
Thank you Dorothy 🙂 She is cute with a healthy dose of little monster too! Hope your grandchildren enjoy themselves as much as Evey did.